
http://www.horizontalhive.com/how-to-build/hive-frame-swarm-trap.shtml
LAYENS HIVES & FRAMES AVAILABLE FROM OUR STORE >>Hives include all frames, fully assembled & ready to go
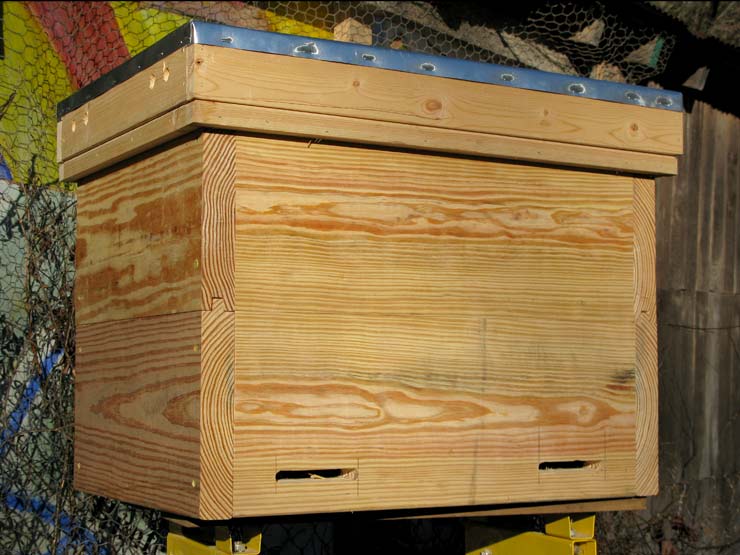
Layens is the original horizontal hive with extra-deep frames, invented in the 19th century by the famous French beekeeper Georges de Layens.
More than 1 million hives of this model are in use today, and this is the hive I and my bees prefer.
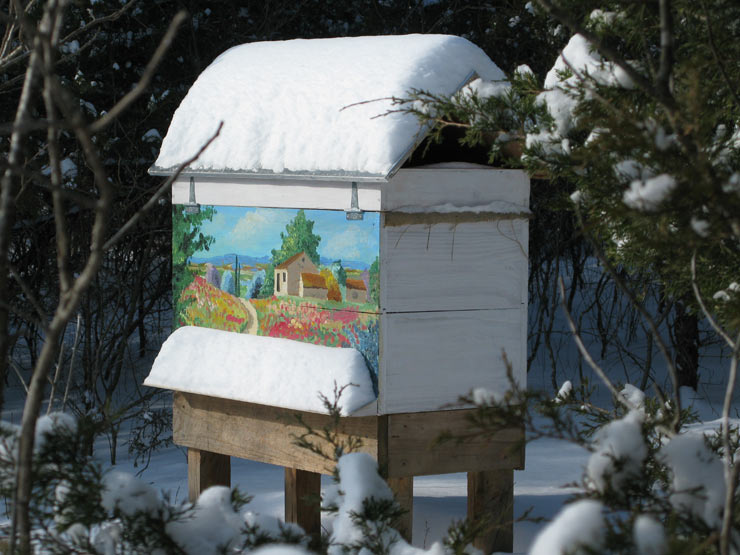
The Layens hive is ideal for successful overwintering and rapid spring colony buildup even in the very cold climates.
This model features 1-1/2” walls to protect your bees from the summer heat and winter cold. This version accepts 14 Layens frames (equivalent to 18 Langstroth deeps) and holds up to 45 lb of surplus honey. If you live in an area with a more abundant honeyflow, simply make the box longer by 1-9/16” per each additional frame desired. Depending on the area and your management choices, Layens hives can be anywhere from 12 to 30 frames.
Material list
- 2” x 10” x 14’, untreated (actual board size 1-1/2” x 9-1/4” x 14’).
- 1” x 8” x 8’, untreated (actual board size 3/4” x 7-1/4” x 8’).
- 1/4” plywood, construction (sheathing) grade, untreated. One 4’ x 8’ sheet enough for seven hives.
- 20” aluminum flashing, 30” long.
- Wood glue (e.g., Titebond III), less than 1 oz needed.
- 3” deck screws, 16 per hive.
- 1-1/2” staples or 1-1/4” deck screws or nails (50).
- 1” staples or 1-1/4” nails (20).
- 3/8” T50 staples.
- Insect screen, steel or aluminum, 1” x 20”.
- Exterior acrylic primer/sealer (1 pint per hive) and light-colored exterior acrylic paint (1 pint per hive); a wide brush.
You can complete this project using a variety of tools. This is what I use:
- Table saw.
- Sliding miter saw (alternative: circular saw or hand saw with a guide).
- Cordless drill; small bit for pilot holes; 1/2” bit for ventilation holes; driver bits for screws.
- Router with 1/4” and 1/2” straight bits and 45° chamfer bit.
- Air compressor with narrow crown and T50 staple guns (alternative: hammer & nails, manual stapler).
- Right-angle clamps, four (e.g., Bessey WS-3) — optional but helpful.
- Square, tape measure, utility knife, metal shears.
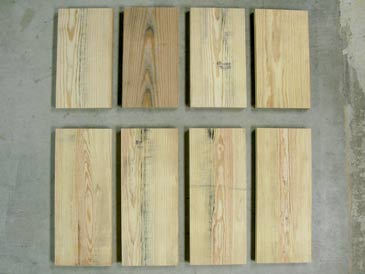
Step 1. Cut the “two-by-ten” board into eight pieces: 21-7/8” (4) and 16-11/16” (4). Rip all eight boards to 9-1/8” wide. These are the walls.
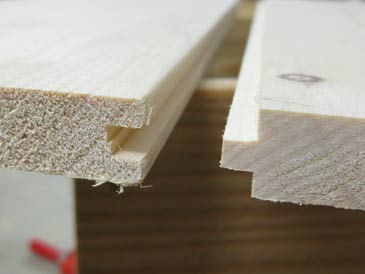
Step 2. Prepare the tongue-and-groove joint: cut a 1/2” x 1/2” tongue along one side of two long boards and two short boards. Cut a 1/2” x 1/2” groove alone one side of two long boards and two short boards.
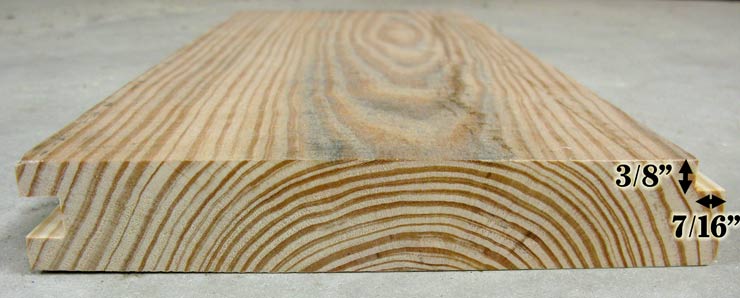
Step 3. Cut a rabbet 3/8” by 7/16” along one edge of the long grooved boards. These are the frame rests.

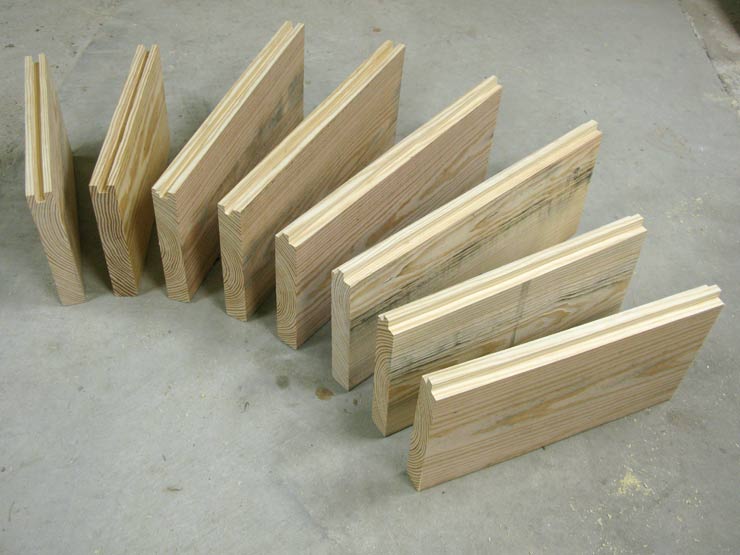
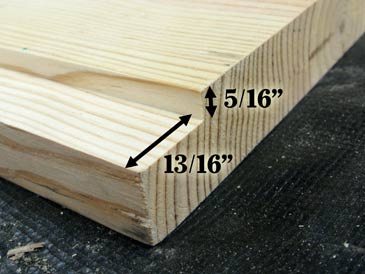
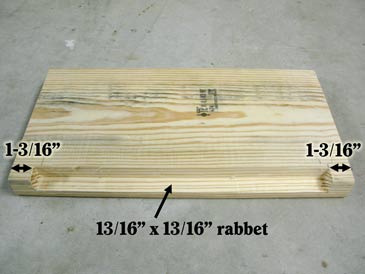
Step 4. Cut a rabbet 5/16” x 13/16” along one edge of the long boards that have a tongue. On the short boards with a tongue, cut a 13/16” x 13/16” rabbet stopping 1-3/16” shy of each butt end.
Step 5. Cut two entrances in one long board with a tongue. Each entrance is a slot 4” wide by 1/2” tall. They are 1-1/4” from the bottom edge of the board; 2” from each end. To cut the entrances I use a router with a 1/2” straight bit. (If you do not have a router, you can drill a hole then use a jigsaw instead.)
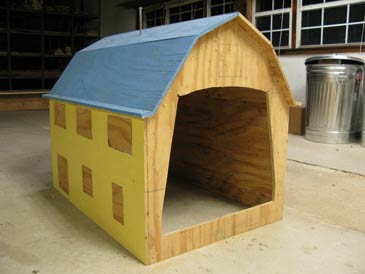
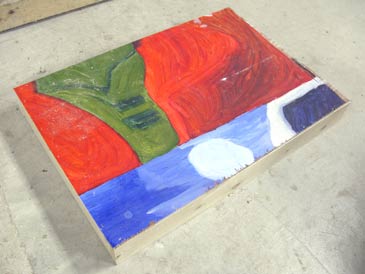
Step 5b. Oops! My daughter asks me to build a dog house for her collie pup. So I take some plywood and nail one together. If you don’t have a collie pup, skip this step and go to Step 6 below.
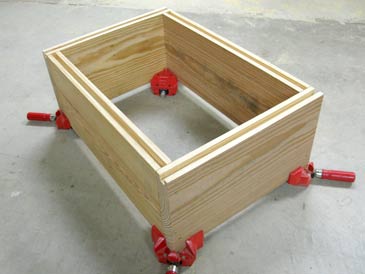
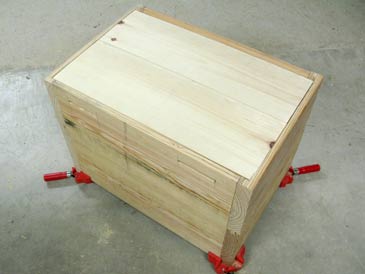
Step 6. Assemble the hive box. Position the grooved boards on a flat surface: long boards go between short boards; grooves face up; frame rest rabbets on the long boards look inside. Check for right angle, drill pilot holes, and assemble on 3” deck screws, two per corner.

Step 7. Apply glue to tongues and grooves, connect the boards and assemble the second tier on 3” deck screws, two per corner.
Step 8. Cut two 23-3/8” pieces from the “one-by-eight” board. Cut a tongue-and-groove joint (tongue 1/4” x 1/4”) and glue the boards together. Insert them into the rabbet on the hive body; attach with 1-1/2” staples or nail/screw into place.

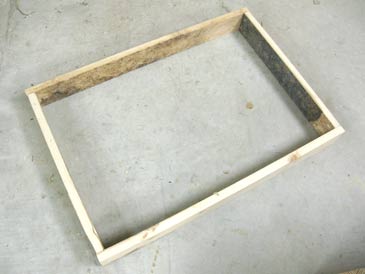
Step 9. Rip the remaining piece of “one-by-eight” into two planks 2-1/2” wide and cut them into four pieces: 26-5/8” (2) and 16-15/16” (2). Put the shorter planks between the long planks, check for right angle and connect with 1-1/2” staples or screws, forming a frame.
Step 10. Cut a piece of 1/4” plywood 26-5/8” x 18-7/16” and attach to the frame with 1” staples or nails.
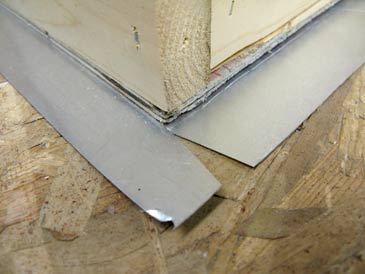
Step 11. Cut a 28-5/8” piece of 20”-wide aluminum flashing; lay it on a flat surface; center the top on it; lightly score the perimeter with a utility knife; cut the notches on all four corners; then fold and staple into place with 3/8” staples.
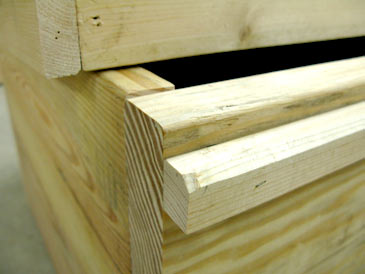
Step 12. Rip what remains of the “one-by-eight” board into two strips 15/16” wide. Cut them into four pieces: 26-3/8” (2) and 16-11/16” (2). Take off 1/8” of one edge of each plank using a 45° chamfer bit (this makes the drip edge), then nail to the hive body 1/2” from the top edge of the box, the drip edge facing up. This rim will support the top.
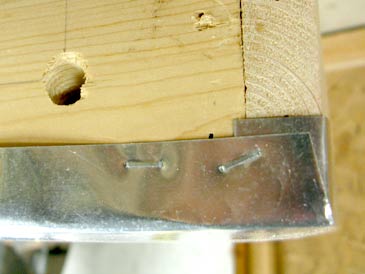
Step 13. The final detail: ventilation. Drill four 1/2” holes on each short side of the top. When drilling, tilt the drill down so the hole is sloped up to prevent rainwater from entering. If you climate has very hot summers, you may drill a couple more holes on each side. On the inside of the top, cover the holes with aluminum or steel insect screen mesh and staple into place with 3/8” staples. Make a 1/2” x 3” slot in the center of the bottom, cover it with screen mesh (on the inside) and staple into place. Done!

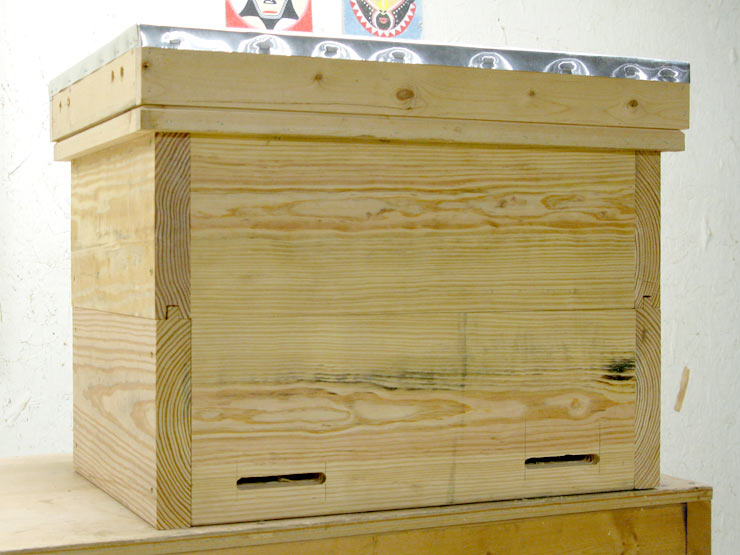
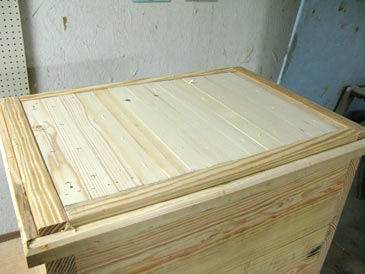
Your Layens hive is ready for some bees. Frames’ top bars create a nice ceiling, retaining the warmth inside the hive and minimizing disturbance during inspections. The space above the frames is ventilated and can be filled with insulation for the winter. Thick walls and a deep and relatively narrow nest mimic a tree hollow.


The best part, of course, comes during the actual use. The Layens hive is a pleasure to work with, and with the plentiful reserves stored in the deep frames, the bees overwinter great, build up strongly in the spring without any feeding, and do excellent throughout the season. This is the hive that was designed to be managed with only two hive visits per year. Enjoy!

LAYENS HIVES & FRAMES AVAILABLE FROM OUR STORE >>
Hives include all frames, fully assembled & ready to go
If you haven’t signed up for our email list yet, please join it below so we can notify you when detailed Layens hive management recommendations and more free plans become available. (Only 2-3 emails per year, and you can unsubscribe at any time.) We are working to bring you the bees... and the smile!
— Dr. Leo Sharashkin, Editor of “Keeping Bees With a Smile”
Layens Frame Plans
LAYENS HIVES & FRAMES AVAILABLE FROM OUR STORE >>Hives include all frames, fully assembled & ready to go
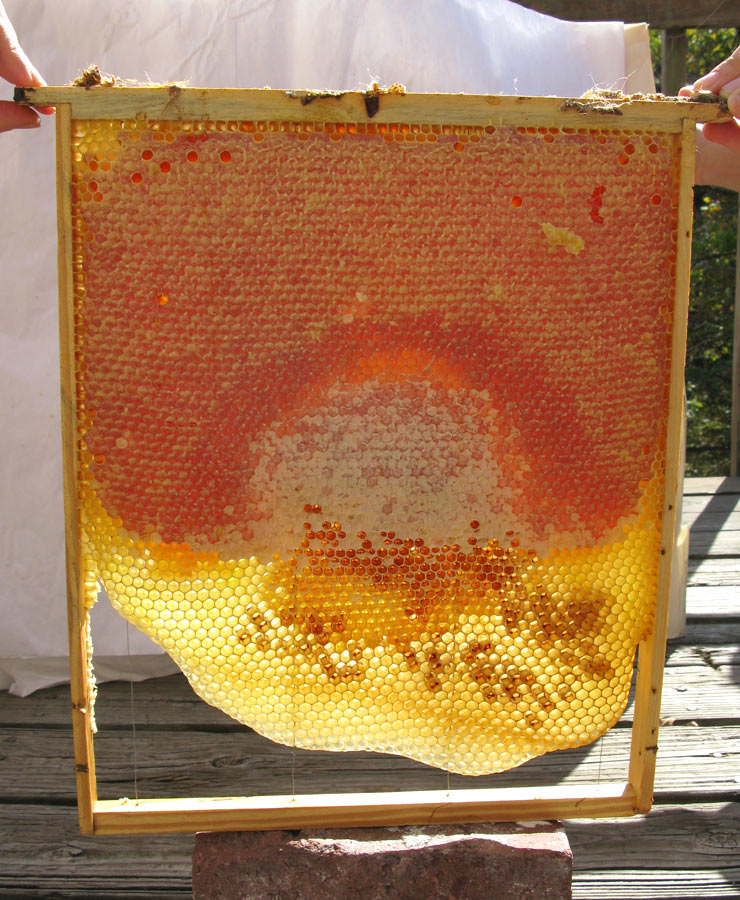
Wintering bees naturally move up on honeycomb. The classical Layens frame was designed to be deep enough for successful overwintering and rapid spring buildup. It mimics the size of comb found in tree hollows and has been in continuous use since the 19th century. Over one million hives use the Layens frames today, and it is my favorite. It offers ideal colony development conditions consistent with honey bees’ biology, and all frames are positioned on the same level horizontally so there are no heavy supers to lift!
The top bars are made to touch — this helps to retain heat inside the brood nest and minimizes disturbance during inspections. According to numerous authorities this frame is perfect for wintering in cold climates.
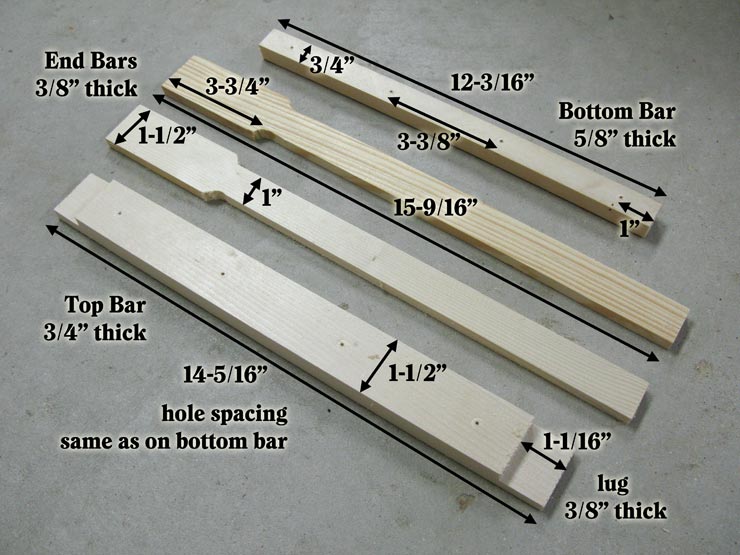
The Layens frame consists of four parts:
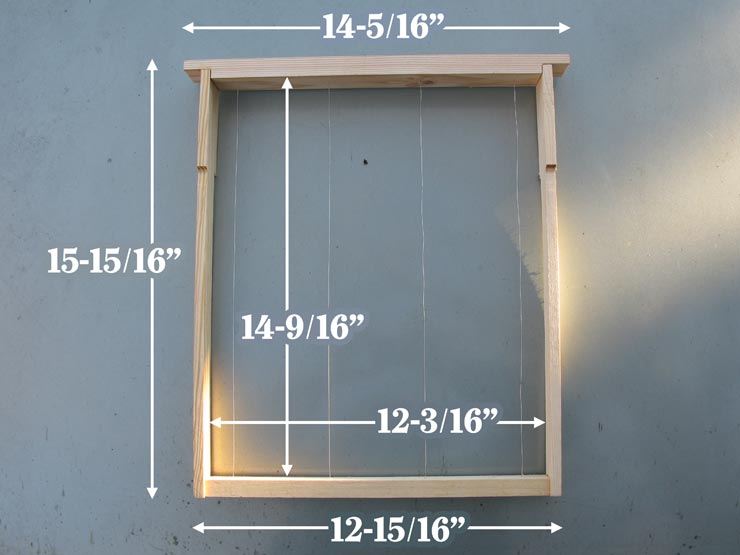
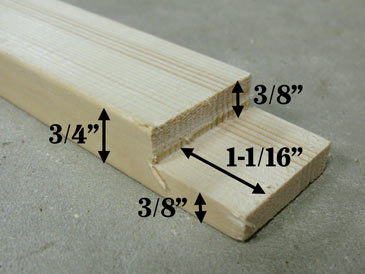
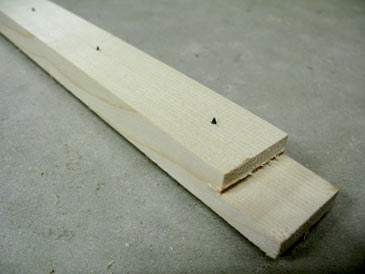
- Top bar — 14-5/16” x 1-1/2” x 3/4”, with 1-1/16” x 3/8” rabbets cut on two ends. It has 4 holes (3/32”) drilled along the center of the bar 1” from the rabbets and 3-3/8” between holes.
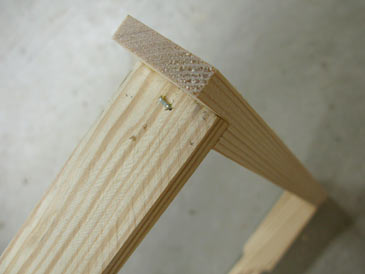
- End bars (2) — 15-9/16” long x 3/8” thick. The wider part is 1-1/2” wide and 3-3/4” long; it then tapers to the thinner part which is 1” wide.
- Bottom bar — 12-3/16” x 5/8” x 3/4”. It has 4 holes (3/32”) drilled along the center of the 3/4”-wide side 1” from each end and 3-3/8” between holes.
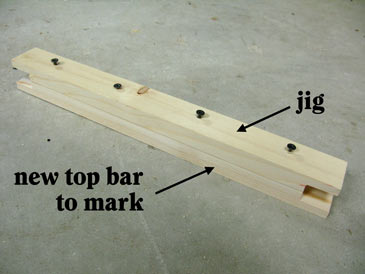
Mark the holes and drill from the bottom side of the top bar (the side that will look inside the frame). 3/32” drill bit and a hand-held drill do the trick. To mark holes quicker, make a jig: take a top bar with the holes you just drilled and drive 1-1/4” drywall screws into the holes so they protrude by 1/16” on the bottom side. Press the jig on the new top bar, and hole positions are impressed. Voila!
To make end bars I cut a 15-9/16” piece of “two-by-” stock (actual thickness 1-1/2”), slice it in 3/8” planks, then take 1/4” off each side with a router along 12” of the length, leaving 3-3/4” of the plank intact (1-1/2”). This results in end bars that are 1-1/2” wide on top and 1” wide further down.
The bottom bar is simply a plank 12-3/16” x 5/8” x 3/4” ripped from any “one-by-” or “two-by-” stock. The holes along the center of the 3/4” side are made the same way as on the top bar (drill from the top side of the bottom bar, i.e., from the side that looks inside the frame).
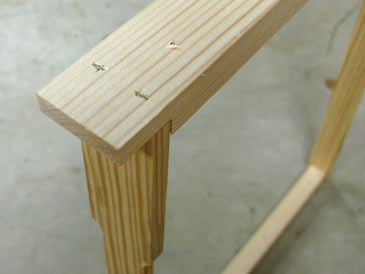
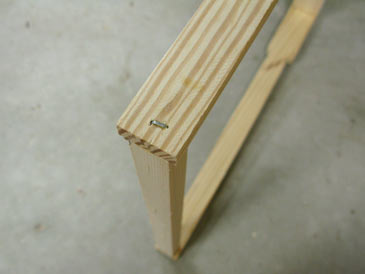
Assembly. It is handy to make of jig that will hold the end bars square while you attach the top bars and bottom bars. If you don’t assemble too many frames, you can just check the angle with a square as you nail them together. Apply a bead of wood glue and drive two 1” staples (or hammer in nails) through the top bar into the end bar; then one through the end bar back into the top bar; then one staple through the end bar into the bottom bar. The frame is ready.
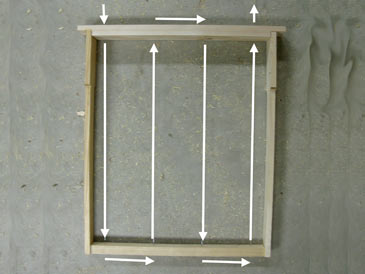
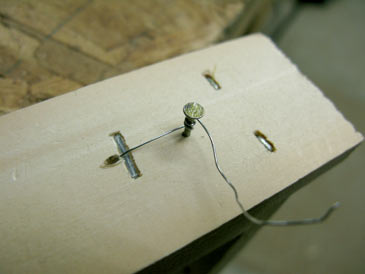
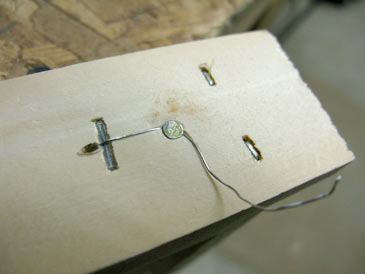
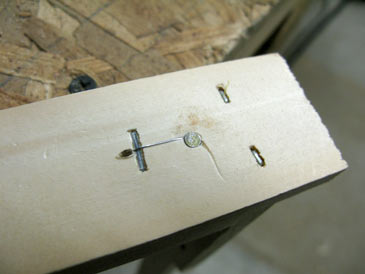
Wiring. First, drive 3/8” staples into the top of the top bar as shown (red dots represent holes). These staples prevent wire from eating into the wood. They are to the left of holes 1 and 3 and to the right of holes 2 and 4.
Next, drive 3/8” staples into the bottom of the bottom bar as shown (red dots represent holes). They are to the right of holes 1 and 3 and to the left of holes 2 and 4.

Run wire through the holes as shown. Drive 3/4” nails outside the top bar’s holes 1 and 4. Wind wire around one nail, drive it in, twist wire to break it off. Tension the wire, pulling by each segment of the wire. Then wind the end around the second nail, drive it in, and twist the wire to break it off.

You can then embed wax foundation (the easiest way is to put the sheet of foundation in and run 12 volt current from a car battery). If you want to go foundationless, just embed a 1” strip foundation along the top bar. Either way will work well.
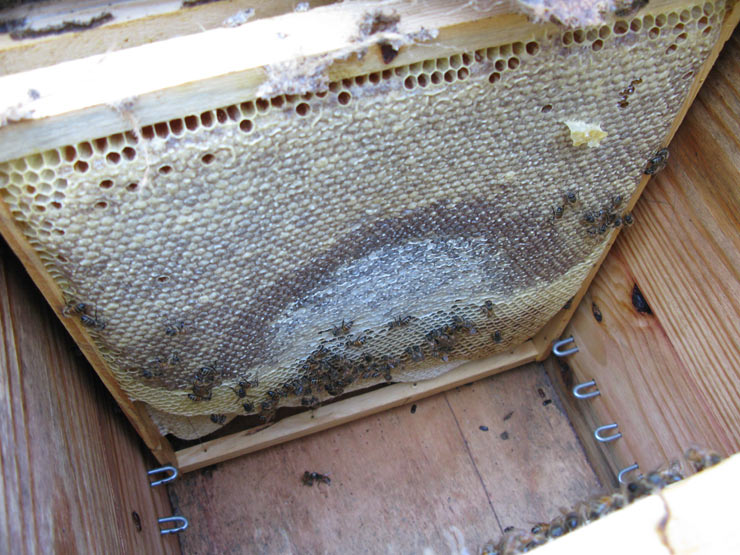
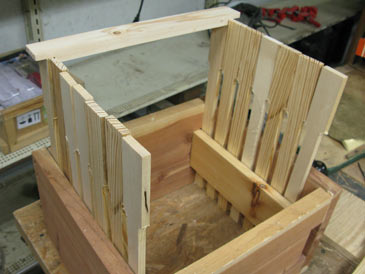
Bees love these frames. They leave plentiful stores up top, with some empty cells on the bottom for the cluster to form on.
LAYENS HIVES & FRAMES AVAILABLE FROM OUR STORE >>
Hives include all frames, fully assembled & ready to go
If you haven’t signed up for our email list yet, please join it below so we can notify you when detailed Layens hive management recommendations and more free plans become available. (Only 2-3 emails per year, and you can unsubscribe at any time.) With best wishes to you and your bees,
— Dr. Leo Sharashkin, Editor of “Keeping Bees With a Smile”
Δεν υπάρχουν σχόλια:
Δημοσίευση σχολίου